|
Account Signatures |
  

|
Navigation: Setup > Administrator Options >
Account Signatures
|
Account Signatures |
|
CIM GOLDTeller Functions menu > Administrator Options > Account Signatures
CIM GOLDTeller® offers Capture Account Signatures, which assists in quickly and easily linking customer signatures and/or images to accounts. When the signatures are linked, you can set up specific transactions to show these images while the teller is processing the transactions. Capture Account Signatures uses CIM GOLD® GOLDDocument Imaging® in capturing and displaying these images. Please refer to the CIM GOLDTeller® Setup document, section CIM GOLD® GOLDDocument Imaging® Instructions, for step-by-step setup information.
To capture account signatures:
1.Select Functions > Administrator Options > Account Signatures > Capture Signatures.
The following dialog box box displays:
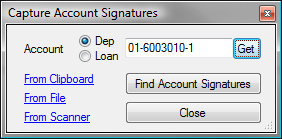
2.Enter the account number, marking the appropriate account type, and click <Get>.
NOTE
Confirm that the account number entered is the desired account. This function does not verify that the account is an existing account on the system. As a result, you may link an image to a non-existent account. |
3.Choose the source, by clicking the hypertext, from which the signature will be captured.
•From Clipboard: Signature was captured and is currently saved to the Microsoft Office Clipboard.
•From File: Signature was captured and saved on a PC or network folder.
•From Scanner: Signature will be scanned and captured via scanning equipment.
4.Enter the Description and Image Type in the Image Data Input Form and click <OK>.
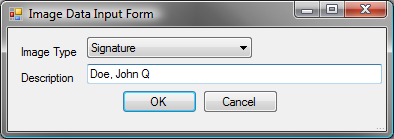
NOTE
A recommended description entry is Last Name, First Name Middle Name (as seen above). Following this format will allow users to later easily search signatures by name (description), rather than account number, if desired. The Image Type should remain as "Signature." |
The signature image will then be displayed by the Image View function box.
5.Click the Crop Image icon to cleanup and resize the signature image.
From the Crop Image display, use the Cropping Rectangle to position and resize the signature image.
6.Click and drag a corner of the cropping rectangle to reposition it. Do the same on the opposite corner. The right-hand view shows how the signature image will appear.
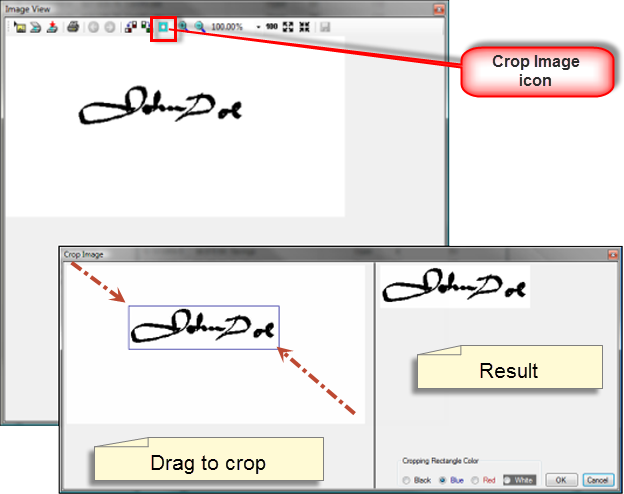
7.Press <OK> once the signature image is displayed as desired.
The Image View will now show the newly cropped image as well.
8.To save the image, click the <Save> icon ![]() ; then click the Close Icon
; then click the Close Icon![]() , which will then display a dialog box box indicating that the image was saved successfully.
, which will then display a dialog box box indicating that the image was saved successfully.
Use Find Account Signatures to manage existing signature images. Signature images may be viewed, printed, copied, or deleted using the Account Images dialog box box.
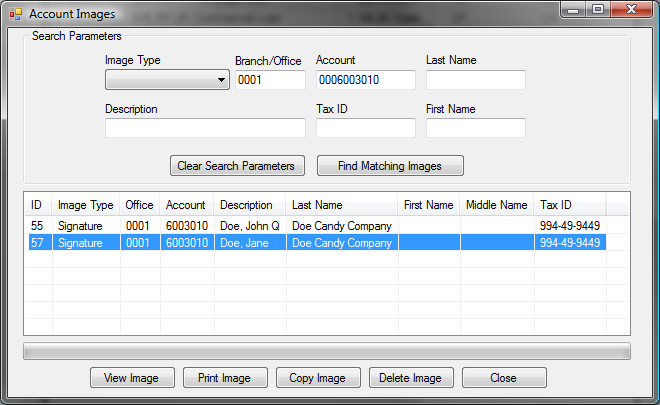
To search by account:
1.Enter the Branch and Account number and click <Find Matching Images>. All images linked to that account will be displayed.
To search by description:
1.Enter the description and click <Find Matching Images>, which will display all signatures with that description.
NOTE
As was previously mentioned, a recommended entry format is Last Name, First Name Middle Name, such as "Doe, John Q." |
To search by Tax ID:
1.Enter the Tax ID number and click <Find Matching Images>, which will retrieve all signatures linked to the Tax ID number.
NOTE
The Tax ID number search references only IRS Owner numbers and their accounts. |
To search by Last Name and/or First Name :
1.Enter the name and click <Find Matching Images>, which will retrieve signatures linked to a matching name.
NOTE
The name searches only reference IRS Owner names and their accounts. |
From the search results box, highlight the desired imaged. This will activate the <View>, <Print>, <Copy>, and <Delete Image> buttons.
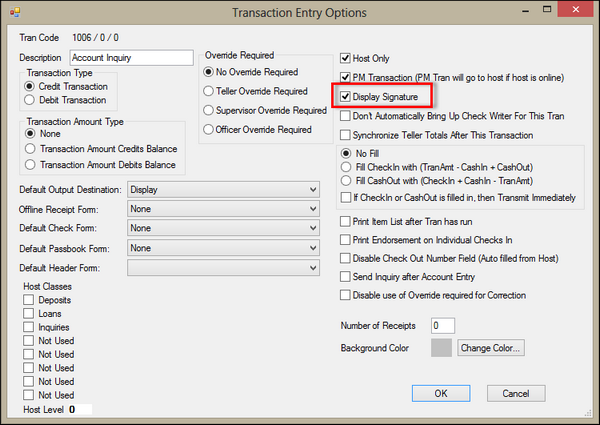
Signatures and driver's licenses can be shown on specific transactions as tellers process them. You can make the signature image appear upon entering the account number in the teller transaction.
To set up this signature display:
1.Select Functions > Administrator Options > Transaction Design.
2.Select the transaction you want to customize.
3.Click <Options>, Display Signature.