|
Return an Inbound Wire in a Completed State |
  

|
Navigation: Creating ISO Wires > How to Return a Wire - ISO Pacs.004 >
Return an Inbound Wire in a Completed State
|
Return an Inbound Wire in a Completed State |
|
FRB Regulations for Returned Wires
The Return Chain in a pacs.004 must identify all parties/FIs involved in the pacs.004 return payment; these parties/FIs should be identified by their role in the pacs.004 and not by their role, if any, in the original pacs.008 or pacs.009 message.
For more information, see https://www.frbservices.org/resources/financial-services/wires/faq/iso-20022/format.
How to Return an Inbound Wire in a Completed State
This section explains how to create a manual Payment Return wire (Pacs.004) for a received Customer Credit Transfer wire (Pacs.008 or Pacs.009) that is in a "Completed" state, with the following Local Instrument Codes.
Pacs.004-Pacs.008: Customer Payment Return |
Replaces FAIM |
|||
|
Local Instrument Code |
|
Business Function Code |
Type Code |
|
CTRC |
Core Customer Transfer |
CTR, CTP |
1002, 1008 |
|
CTRD |
Customer Drawdown Transfer |
DRW |
N/A |
|
CTRS |
Special Account Customer Transfer |
CTR, CTP |
1002, 1008 |
Pacs.004-Pacs.009: Financial Institution Payment Return |
Replaces FAIM |
|||
Local Instrument Code |
|
Business Function Code |
Type Code |
|
BTRC |
Core Bank Transfer |
BTR, CKS, DEP, FFS, FFR |
1602, 1608 |
|
BTRD |
Bank Drawdown Transfer |
DRW |
N/A |
|
BTRS |
Special Account Cover Payment |
CTP |
1502, 1508 |
|
COVC |
Core Cover Payment |
CTP COVS |
1502, 1508 |
|
COVS |
Special Account Cover Payment |
CTP COVS |
1602, 1608 |
|
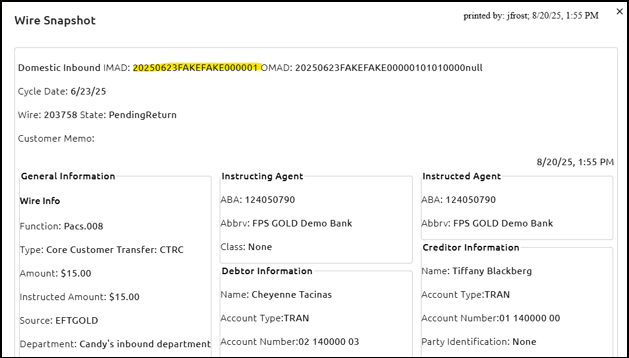
1.Print a Wire Snapshot of the wire you want to return by clicking the <Print> button in the Actions column.
2.Copy the IMAD from the wire that is being returned:
3.Click the <+New Wire/Template> button.
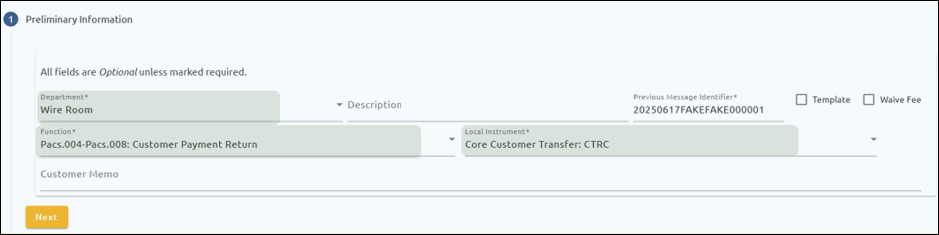
4.In the Preliminary Information field group, select the Department, Function, and Local Instrument.
5.Paste/enter the IMAD from the wire being returned in the Previous Message Identifier field, then click <Next>.
. 
| The Instructing Agent is defaulted with your institution information. |
6.Enter the Instructed Agent information and Amount (the Instructing Agent from the wire snapshot).

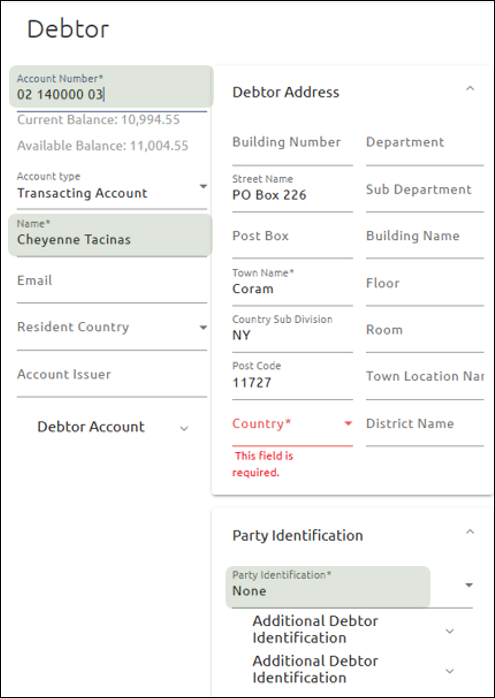
Debtor
7.Enter the Debtor Account Number, Name, Address, and Party Identification (the Creditor from the wire snapshot).
Your core may auto-populate data when you select an account-name combo.
Party Identification for international wires triggers a Dodd Frank notice.
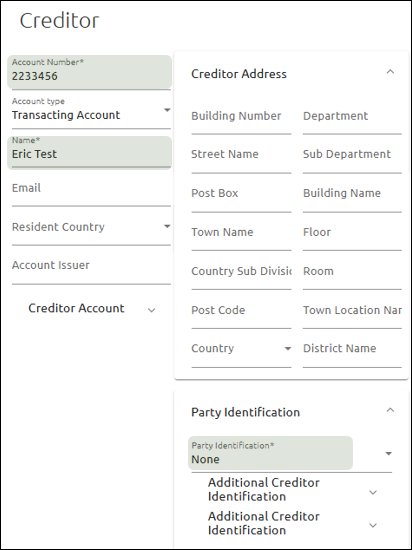
Creditor
8.Enter the Creditor Account Number, Name, Address, and Party Identification as needed (the Debtor from the wire snapshot).
Town Name and Country fields are required; the other address fields are optional.
Debtor Agent
These values are defaulted from the Instructing Agent fields. Unless you originate wires for other financial institutions, this will always be your institution information.
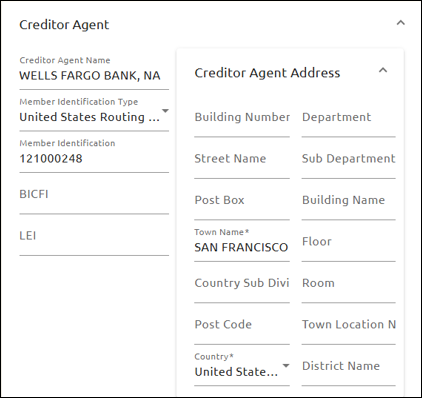
Creditor Agent
These values are defaulted from the Instructed Agent fields.
If the BICFI is entered, the Member Identification Type should be set to “None,” and the Creditor Agent Name and address fields are not required.
9.Enter the Creditor Agent Address information. Town Name and Country are required; the other fields are optional.
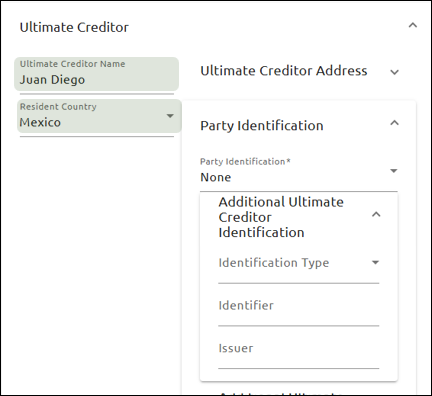
Ultimate Creditor
10.If the Creditor is receiving the wire on behalf of another party, enter the Ultimate Creditor Name, Resident Country, and Ultimate Creditor Address information. Town Name and Country are required if provided (the Ultimate Debtor from the wire snapshot, if present).
11.Enter any additional information in the Additional Ultimate Creditor Identification fields. Up to two identifiers can be entered.
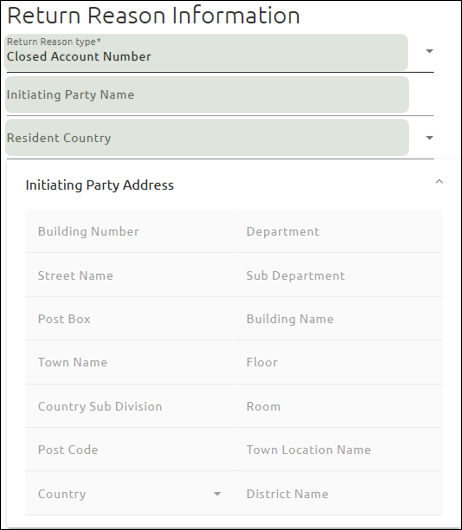
Return Reason Information
12.Select the Return Reason Type and enter Initiating Party Name, Resident Country, and Initiating Party Address (optional – Town Name and Country are required).
The Initiating Party is the party requesting the return. This could be the debtor or the wire operator name at the institution that decided to return the wire.
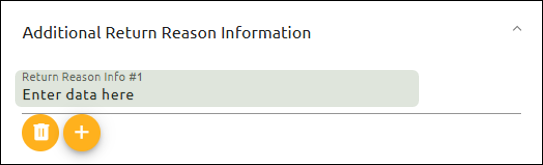
Additional Return Reason Information
13.Enter additional return reason information, if desired.
14.To add information, click ![]() .
.
Unstructured Remittance Information
15.Enter the Originator to Beneficiary Information in this field.
If Structured Remittance Information is used, this option will be unavailable.
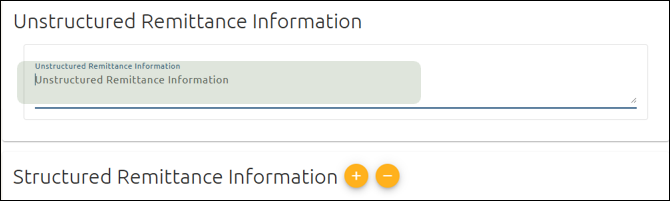
Structured Remittance Information
16.Enter structured information as requested. You are limited to one structured record for an outbound wire.
If Unstructured Remittance Information is used, this option will be unavailable.
Release Time
17.Accept the default value in the Release Method field.
Please consult your internal policies and procedures before making changes to the default value.
Important: The release time cannot be edited after the wire is created.
18.Click <Create Wire> or <Create and Submit Wire>.
.
Once the wire is approved, it will be sent.