Navigation: Setup > Administrator Options >
System Field Dictionary
CIM GOLDTeller Functions menu > Administrator Options > System Field Dictionary
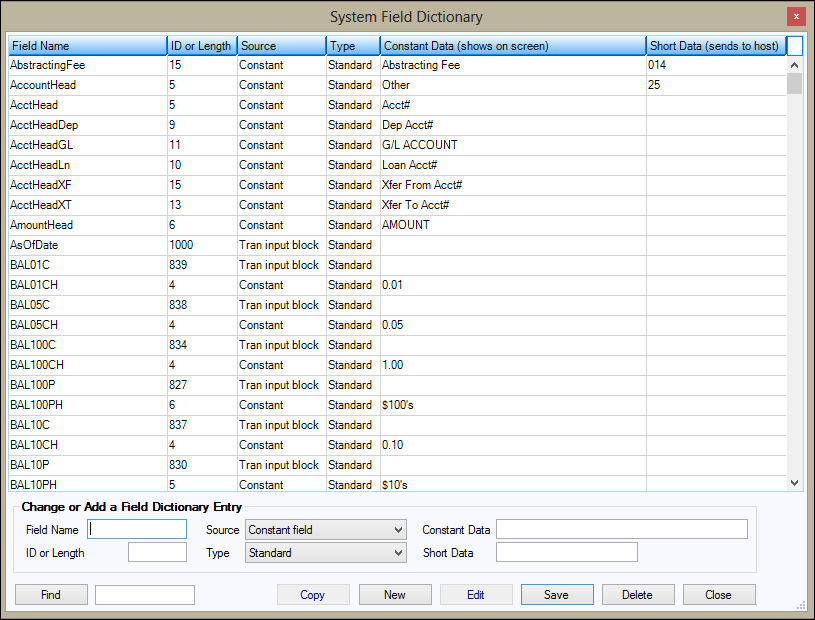
The System Field Dictionary is used to create fields to be utilized for drop boxes on transactions. The value entered on the field can be used to populate a field on the system. Once the field is created, it is available to be used in View/Modify Drop Lists.
An example of a helpful drop list is for retirement distributions. The IRS code for the distribution type (i.e., death, normal or premature) is selected from the drop box and populates the distribution field on the system. You can limit the distribution codes to the distribution types your institution supports in the View/Modify Drop Lists function.
To begin, select from the Function menu Administrator Options/System Field Dictionary.
To add a new field:
1.Click <New>.
2.In the Field Name field, enter the new field to be created.
NOTE
If more than one field will be grouped for a drop box, type the same first few characters for each field name. This way, they will be grouped together in the list box and easily accessed when selecting them for the drop-down list. |

3.Leave the ID or Length field blank. The system will automatically fill it in with the length of the field name. Change this only if you want to shorten the field name.
4.Enter the description in the Constant Data field. This description will display in the drop-down list. The drop-down list can show only approximately 20 characters.
5.In the Short Data field, enter the value to be sent to the system to populate a host field.
6.Click <Save> to save the field into the list box.
NOTE
The fields in the list box show in alphabetical and case order. |
To copy a field to create a new field:
1.Highlight the field in the list box to be copied.
2.Click <Copy>.
3.The New Field box will appear populated with the information for the copied field.
4.The only field needed is the Field Name; enter the new field name.
5.Click <Save>.
To edit an existing field:
1.Highlight the field in the list box to be edited.
2.Click <Edit>.
3.Edit the information.
4.Click <Save>.
To delete an existing field:
1.Highlight the field, from the list box, to be deleted.
2.Click <Delete>.
NOTE
The field will be deleted from the drop-down list as well. |