|
Users/Groups |
  

|
Navigation: Administrative Options >
Users/Groups
|
Users/Groups |
|
The Users and Groups Tabs under this option are view-only tabs. The User Permissions, Group Permissions, User Options, and Group Options tabs under this option are file maintainable tabs. Users and Security are set up in CIM GOLD Security > Setup for those on the FPS GOLD Core. Simply assign your Wire personnel to the desired EFT GOLD security profiles. Each profile allows specific functions or actions.
For more information on Security Groups, including a definition of each group, see "Security Groups/Profiles" in the Setup section of this user's guide.

Security Profiles for EFT GOLD
For those not using the FPS GOLD Core product, the security for users will need to be set up on your network or other security access controller software.
The ratio of the number of users listed in EFT GOLD compared to the number of licenses purchased is displayed in the upper-left corner of the screen.
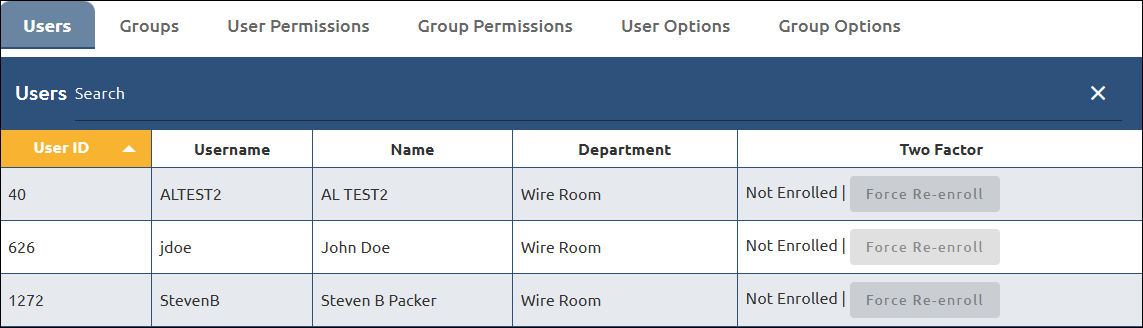
The Users Tab
The Users Tab is sorted by User ID. Click on any column header to change the sort. There is also a search function available. The search will display the matching User, list the Departments assigned to this user, specify whether or not Two Factor Authentication is turned on, and give the option to Force a Re-enroll in Two Factor Authentication if needed.
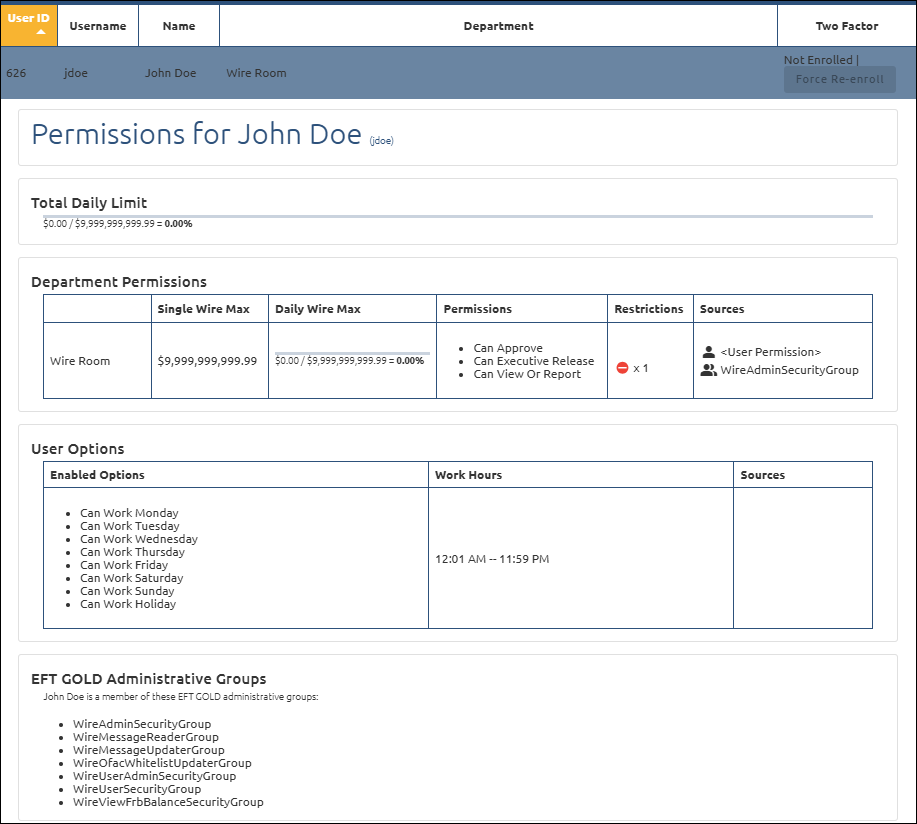
To view a user's permissions:
1.Click to select a user in the Users list.
The Total Daily Limit will display at the top, followed by Department Permissions for each department this user is assigned to, followed by User Options, and finally, EFT GOLD Administrative Groups. Department Permissions include single wire max limits, daily wire max limits, permissions, restrictions, and sources (meaning which security group the permissions come from). User Options include any work day restrictions, work hour restrictions, and sources. EFT GOLD Administrative Groups includes the EFT GOLD Administrative groups this user is assigned to.
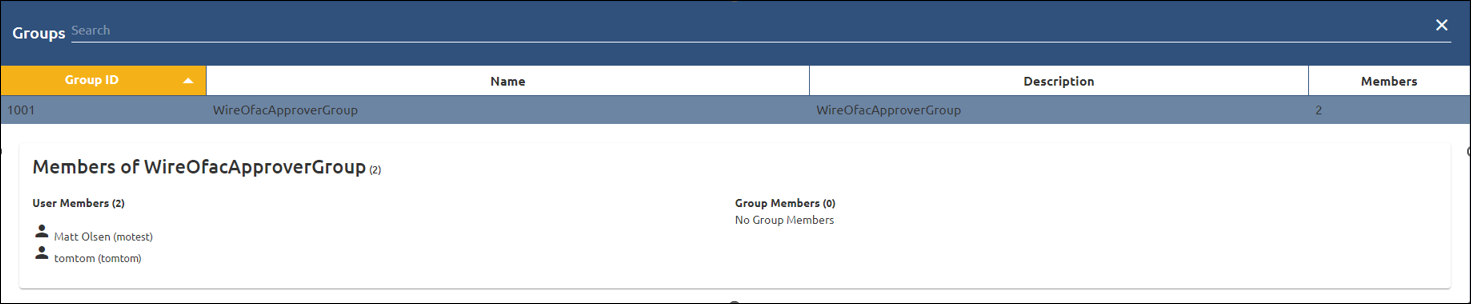
The Groups Tab
The Groups Tab displays all of the security groups and is sorted by Group ID. Click on any column header to change the sort. There is also a search function available. The search will display the matching Group ID, Name, Description, and the number of members in that particular group.

To view the members of a particular group, click to select a group in the Groups list. The User Members that are part of a particular group will be listed as well as any group members (if applicable).
The User Permissions Tab
The User Permissions Tab displays the permission information of all users. See the example below.
This tab is sorted by User ID. Click on any column header to change the sort. There is also a search function available. The search will display the matching User ID, Username, Name, Department, Single Wire Max, Daily Wire Max, Permissions, Restrictions, and Effective Start and End Dates.
To edit a user’s limits:
1.Click on a user in the User Permissions list to open the Edit Permission fields.
2.Make changes to the Single-Wire Limit, Daily Wires Limit, Permissions, or Restrictions. See the table, screen shots, and information below.
3.Click <Save>.
Limit |
Explanation |
Single-Wire |
The maximum dollar amount that cannot be exceeded for a single wire approved by this user. |
Daily Wires |
The maximum dollar amount that cannot be exceeded when combining the approved wire dollar amounts for this user. The total value of the approved wires is combined and compared to the Daily Wires limit above the Daily Wires Max value. |
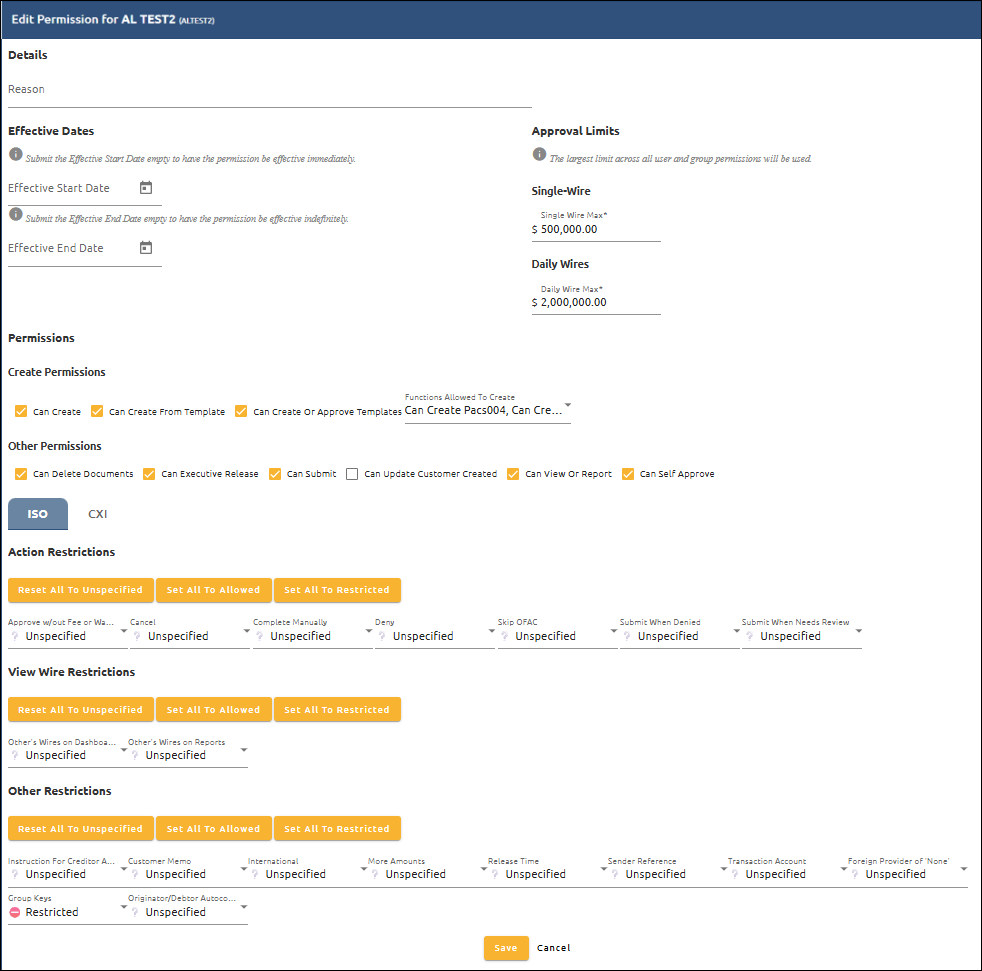
The Restriction fields on User Permissions shown above restrict only the one user named at the top of the Edit Permissions screen (AL TEST2 in the example above).
Each of the Restriction fields above can contain one of the three following options: Allowed, Restricted, and Unspecified. Each of these options is explained below.
Allowed: The named user can view and edit fields on the Create Wire screen that are set as "Allowed."
Unspecified: The named user can view and edit "Unspecified" fields unless a field group record or some other permission restricts it.
Restricted: The named user cannot view or edit the fields marked "Restricted."
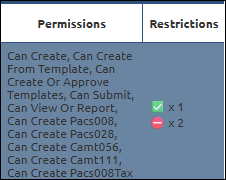
The Restrictions column at the top of the User Permissions tab shows the number of allowed and restricted options. The allowed restrictions are represented with a green checkmark followed by the number ![]() . The restricted restrictions are represented with a red circle with a white line followed by the number
. The restricted restrictions are represented with a red circle with a white line followed by the number ![]() . See the example below.
. See the example below.

Group Permissions Tab
The Group Permissions Tab displays the permission information of all groups. See the example below.
This tab is sorted by Group ID. Click on any column header to change the sort. There is also a search function available. The search will display the matching Group ID, Group Name, Department, Single Wire Max, Daily Wire Max, Permissions, Restrictions, and Effective Start and End Dates.
To edit a group’s limits:
1.Click on the desired group.
2.Make changes to the Single-Wire Limit, Daily Wires Limit, Permissions, or Restrictions.
3.Click <Save>.
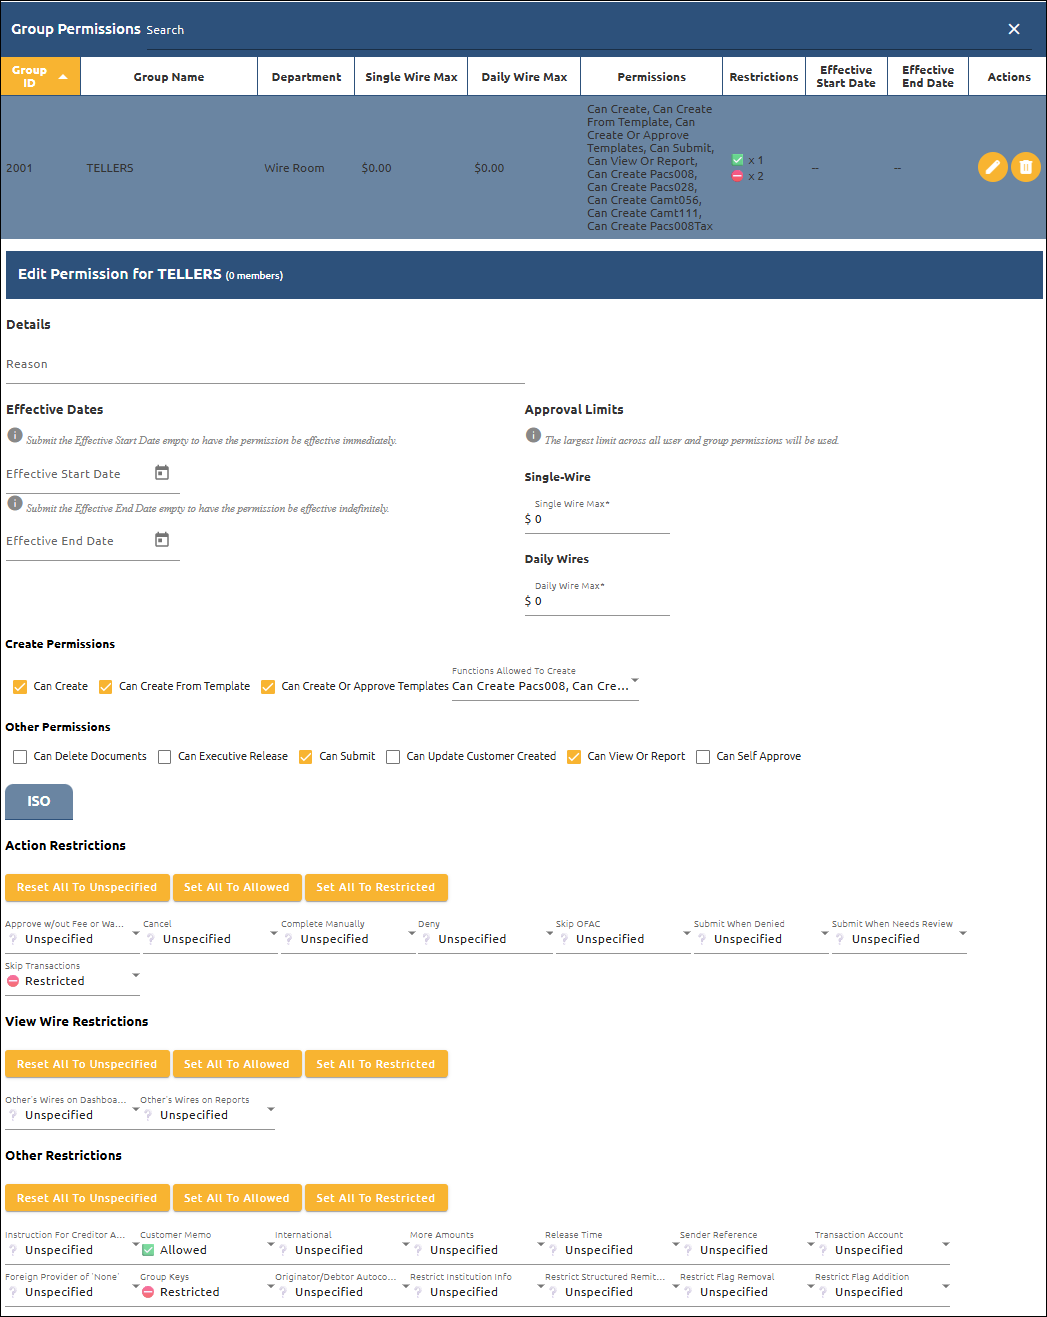
The Restriction fields on Group Permissions shown above restrict all the members of the group named at the top of the Edit Permissions screen (TELLERS in the example above). To restrict individual users, use the Restriction fields on the User Permissions tab.
Each of the Restriction fields above can contain one of the three following options: Allowed, Restricted, and Unspecified. Each of these options is explained below.
Allowed: Members of the group can view and edit fields on the Create Wire screen that are set as "Allowed."
Unspecified: Members of the group can view and edit "Unspecified" fields unless a field group record or some other permission restricts it.
Restricted: Members of the group cannot view or edit the fields marked "Restricted."
The Restrictions column at the top of the Group Permissions tab shows the number of allowed and restricted options. The allowed restrictions are represented with a green checkmark followed by the number ![]() . The restricted restrictions are represented with a red circle with a white line followed by the number
. The restricted restrictions are represented with a red circle with a white line followed by the number ![]() . See the example below.
. See the example below.
The User Options Tab
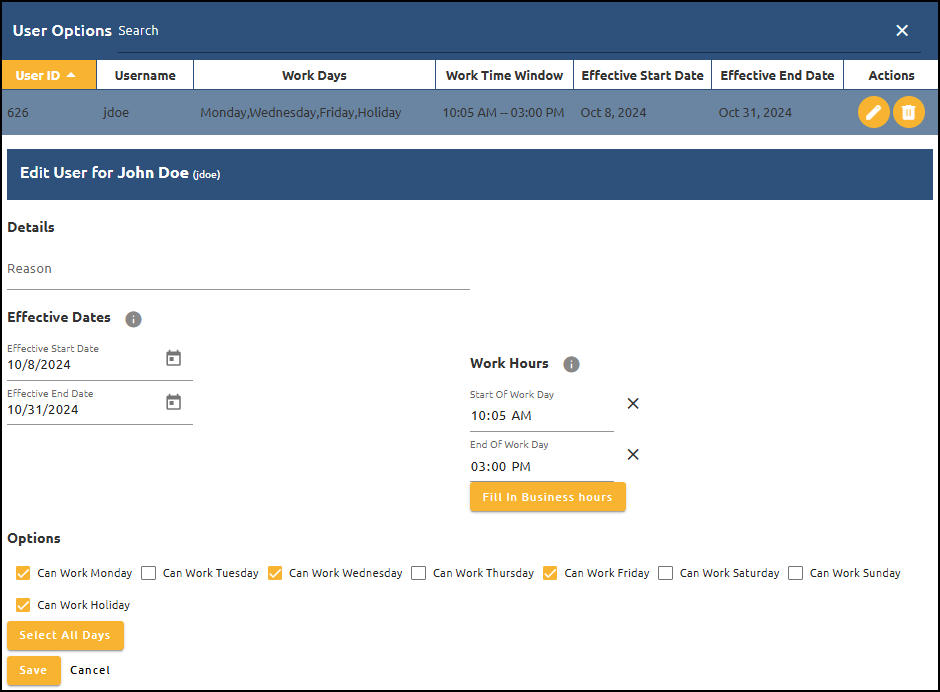
The User Options tab allows control of the Work Hours and/or which days of the week a user can access EFT GOLD.
Under Work Hours, you can click <Fill in Business hours> to automatically populate the Business hours you have set under Admin > Options, or you can enter the hours independently.
Under Options, you can click <Select All Days> or choose the specific days you are allowing access. Can Work Holiday will include the Federal Reserve holidays in addition to any holidays listed under Admin > Options.
The Group Options Tab
The Group Options tab allows control of the Work Hours and/or which days of the week a group can access EFT GOLD.
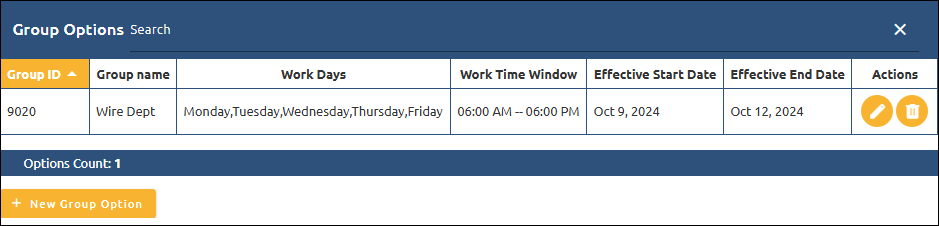
Click  to add other options. The fields below will open.
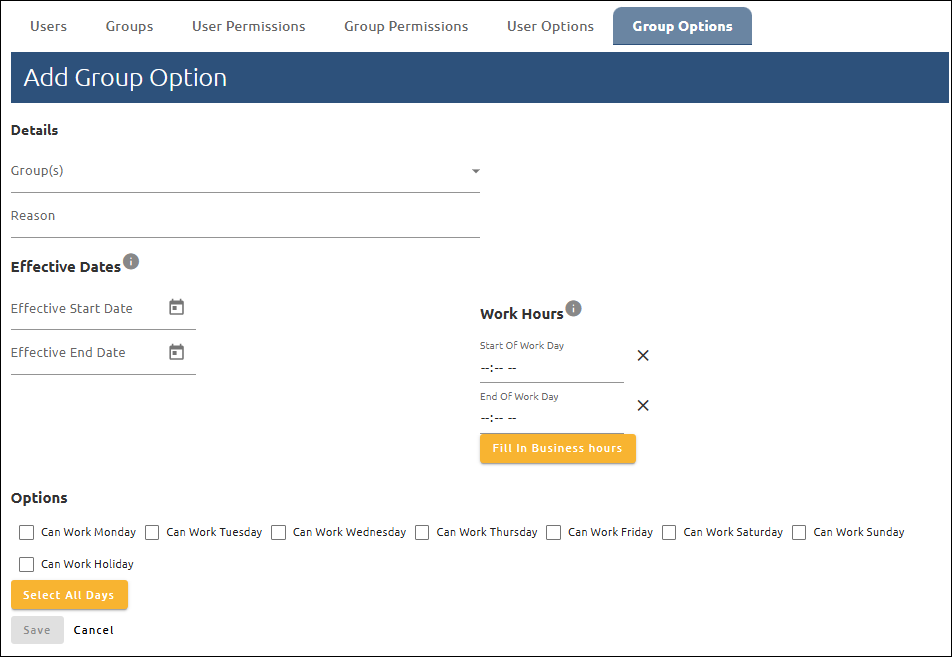
Under Work Hours, you can click on <Fill in Business hours> to automatically populate the Business hours you have set under Administration Options, or you can enter the hours independently.
Under Options, you can click <Select All Days> or choose the specific days you are allowing access. Can Work Holiday will include the Federal Reserve holidays in addition to any holidays listed under your Administrative Options.