Scan Settings Screen |
  

|
Navigation: GOLDVault User Guide >
Scan Settings Screen |
|
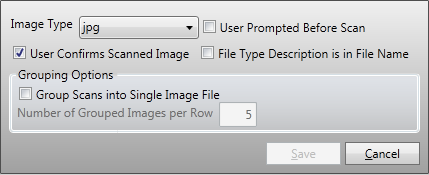
The Scan Settings screen provides parameters to GOLDVault that all institution users will use when scanning documents. Each user can choose to override these settings with others for their own particular use.
Open the Scan Settings screen by clicking on <Scan Settings> on the Settings screen. See the example screen below.
Feature |
Definition |
Image Type |
Select the type of image you want your scanner to create when you scan a document. The preferred type is tif. |
User Prompted Before Scan |
Check this box if you want a pop-up message to prepare the scanner before you begin your scan. |
User Confirms Scanned Image |
Check this box if you want a pop-up message after the scan is complete before it copies the scanned image to your temporary folder. This will allow you to view your scanned image and rescan it if it needs to be adjusted. |
File Type Description is in File Name |
Check this box if the file type description is included in the file name. |
Group Scans into Single Image File |
Check this box if you want all pages of a scanning session to be combined into a single file. If you do not check this, each page will be saved as a separate file. |
Number of Grouped Images per Row |
When you scan multiple documents into a single image file, enter how many documents you want to display per display row when displaying the image file. |
|
Next topic: Setup |
|
Previous topic: Email Settings Screen |