Target Machines tab |
  

|
Navigation: GOLDDeploy Management Screen >
Target Machines tab |
|
Use the Target Machines tab to change and display information about the target machines registered with the server to receive installation packages. When a machine is registered, several attributes of the machine that have to do with installation conditions are saved on the server. Each time the target machine polls the server, it sends updated attributes so that FPS GOLD will have a good summary of the machine at the server.
For information on the columns, see Target Machines list view.
")
Target Machines Tab (left side)
")
Target Machines Tab (right side)
If you have the appropriate security, you can change the settings for a selected target machine.
To change settings:
1.Select an item in the list, then click <Change Settings>.
or
Right-click on an item in the list view and click <Change Settings> on the pop-up menu.
or
Double-click on an item in the list.

Right-Click Menu
The dialog box below opens.

2.Change the settings on the dialog box using the information in the "Select Settings For Highlighted Target Machines" list below.
3.When you have finished changing settings, click <OK>.
The following list explains how to use the fields in the dialog box.
•Change the tags on the target to match the checked tags below – Check this box to change tags, then check each tag that should be assigned to the target machine.
•Change Notification Email Address – When a package is installed on a target machine, an email is sent to this notification address (if not blank) to notify of either a failed or a successful installation. Check this box to change or set this email address, then enter the email address in the text box.
•Change Working Directory – Each target machine must provide the GOLDDeploy Agent a working directory with full security that it can use in doing its installations. Check this box to change or assign the directory, then enter the full path on the target machine of the working directory GOLDDeploy Agent will use.
•Change Parent Server – The parent server is the address of the GOLDDeploy Server at FPS GOLD. It is provided to the bank by FPS GOLD. Check this field to update or set the server address, then enter the correct address in the text box.
•Change Polling Window – Each target machine can be given a daily time period during which it checks the server to see if any software upgrades are prepared for it. Check this box to update or set the polling window, then enter the beginning time and ending times when you want this machine to search for updates.
•Change Query Interval – During the polling window times, the target machine uses this interval to check again for updates. The minimum is every second and the maximum is 4 hours (240 minutes). Check this box to change the query interval. Enter the number of minutes or seconds you want the machine to use for its query interval. FPS GOLD recommends every 15 minutes for usual circumstances.
•Change Delay Until – Each target machine defines what "afterhours" or "at night" means to the machine. The first hour and minute range is the beginning of the night time, and the second hour and minute range is the end of the night time. Hours and minutes are given in 24-hour times (for example, "17:30" means 5:30 p.m.). Check this box to change the afterhours range, then enter the start and end times in the boxes. When the Install At Night option is selected on the schedule, installations will only be performed in the time range specified here.
If you have the appropriate security, you can delete targets, add tags, and remove tags.
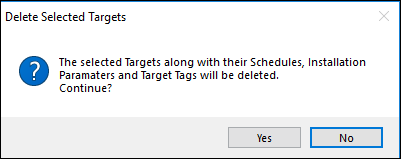
To delete targets:
1.Select one or more items in the list.
2.Right-click to open the pop-up menu (shown above).
3.Select <Delete Targets>.
4.Click <Yes> in the dialog box that displays (shown below).
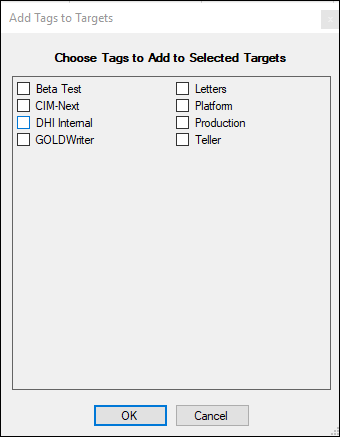
To add tags:
1.Select one or more items in the list.
2.Right-click to open the pop-up menu (shown above).
3.Select <Add Tags To Targets>.
4.In the dialog box that displays (shown below), select the tags you want to add.
5.Click <OK>.
To remove tags:
1.Select one or more items in the list.
2.Right-click to open the pop-up menu (shown above).
3.Select <Remove Tags From Targets>.
4.In the dialog box that displays (shown below), select the tags you want to remove.
5.Click <OK>.

Target Selection Filters field group
See Also