|
How to Attach Documents to Wires |
  

|
Navigation: Using the Dashboard > Handling Inbound Wires > Details, Actions, and Errors for Inbound Wires > Documents tab >
How to Attach Documents to Wires
|
How to Attach Documents to Wires |
|
You can attach documents to wires in two ways: to a wire being created and to an existing wire. Then you can download the attachments and view them.
To attach documents to a wire being created:
1.On the Create Wire/Template Outbound page, scroll to the bottom of the page and click <Add Document>.
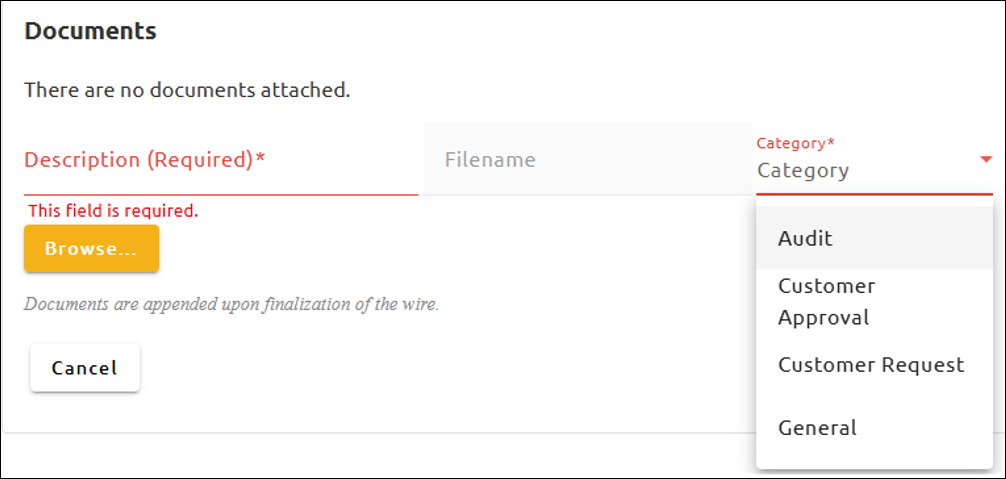
The Add Documents dialog box opens. See the example below.

2.Enter a description for the document.
3.Click the arrow on the Category field and select a category from the drop-down list.
4.Click <Browse...> and select the document you want to attach.
The document will be attached to the wire when the wire is created.
To attach documents to existing wires:
1.On the Dashboard, click on the wire to view its details.
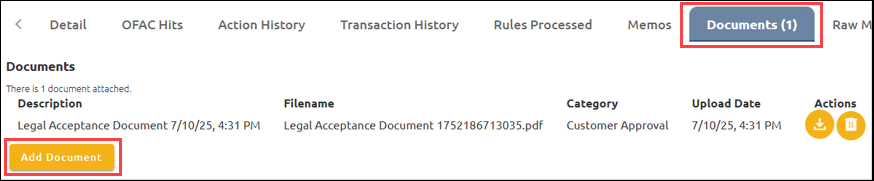
2.Click on the Documents tab at the top right of the wire detail. See the example below.
3.Click <Add Document>.
4.Complete steps 2–4 2 in the section “To attach documents to existing wires” above.
Viewing Attached Documents
The  icon indicates that a wire has one or more documents attached. To download and open attachments, complete the following steps.
To view attached documents:
1.Complete steps 1 and 2 in the section “To attach documents to existing wires” above.
2.Click on the  next to the document you want to view. This will download the file.
3.After downloading the file, browse to where the downloaded file was saved and open the file.