|
Running Transactions for MICR Checks |
  

|
Navigation: Setup > Administrator Options > MICR Check Printing >
Running Transactions for MICR Checks
|
Running Transactions for MICR Checks |
|
With the MICR option turned on, your check format set up, and check number or ranges verified, you are ready to run transactions and print MICR checks.
1.In CIM GOLDTeller, process a transaction that requires a Check Out, such as the one shown below using Withdrawal (tran code 1130) .
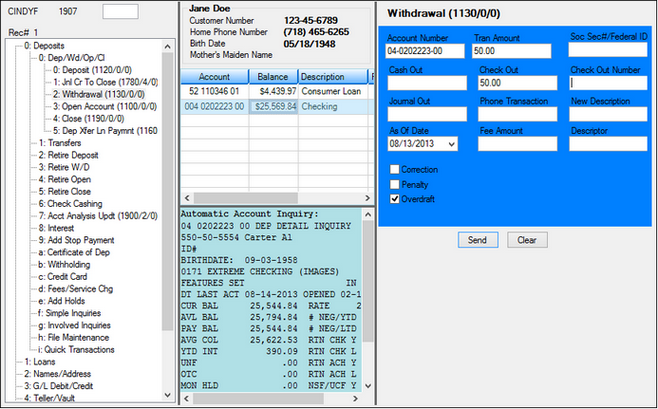
2.Enter the parameters for the transaction, and then click <Send>.
IMPORTANT
Do not enter the Check Out Number. If a check number is entered, the system assumes that a pre-printed check is being requested, and the MICR check printing will be bypassed. When this field is left blank, the system assumes you are processing a MICR check. If you know you will always be using MICR checks, you can disable maintenance on all the Check Out Number fields from transactions (using the Transaction Design function). However, you need to consider what your procedures will be in the event of being offline when running transactions. |
After you click <Send>, the Select Form dialog box box is displayed, as shown below.
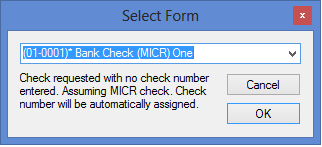
3.Select the check format you want to use from the drop-down list, then click <OK>. ’ Remember: Check formats are set up on the MICR Check Form Design. The formats set up on that screen are the ones displayed in this drop-down list.
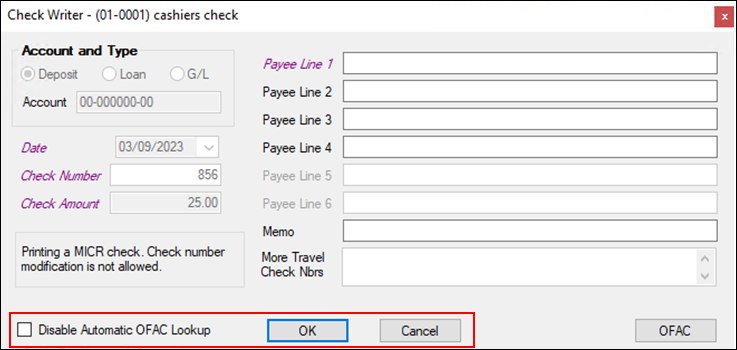
4.Click <OK> and Check Writer is displayed, as shown below.

Check Writer Screen
Notice that the Check Number field is not file maintainable. All other fields are open for file maintenance.
5.Complete the Check Writer details, then click <OK>. OFAC will be called, and the names will be automatically sent to the lookup screen. If there are no OFAC matches, the OFAC screen will flash as it opens and closes, and then the check writer will continue its normal processing.
If there are any matches, your tellers need to validate the results and decide whether to continue processing the check. These matches will continue to be shown in CIM GOLD on the OFAC history screen. See the example below.

If you decide to proceed with the transaction:
1.Close the OFAC dialog box.
2.On the Check Writer screen, click on the Disable Automatic OFAC Lookup field to select it. See the example below.
3.Click <OK> to finish the process.
If you decide not to proceed with the transaction:
1.Click <Cancel>.
The check is printed as designated.
A record of the check is sent to Check Reconciliation.