Manually Entering Transactions |
  
|
Navigation: App. F - G/L Transaction Entry in CIM GOLD > Transaction Entry Screen Details > Posting G/L Transactions >
Manually Entering Transactions |
|
You can manually enter transaction information directly onto the Transaction Entry screen, and then post those transactions to the host computer. The following steps describe how to manually enter transaction information onto the Transaction Entry screen.
To manually enter transactions:
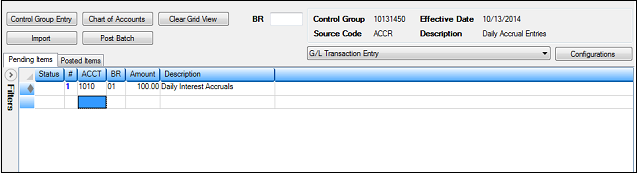
1.After accessing the Transaction Entry screen and entering the control group entry information, select the configuration you want to use for this batch of transactions from the Configurations drop-down list. If you want to create a new configuration, click <Configurations>. For more information on setting up configurations, see Configurations. The fields on the Transaction Entry screen will change according to which configuration you choose.
2.Place your cursor in the first field (after Status) and enter the relevant data, as shown below:
You can also quickly enter account information by completing the following steps:
| 1. | Click <Chart of Accounts> at the top of the Transaction Entry screen. |
| 2. | Double-click the G/L account in the list that you want this transaction to go. |
| 3. | The G/L account you selected will be displayed in the next entry on the Transaction Entry screen. |
| 4. | Change any of the fields for the account number for this transaction. (For example, change the Amount field from the default of "0.00" to the amount of the transaction.) |
3.For the Amount field, you can enter a negative sign (-) if the amount is a credit. The negative sign can go before or after the amount, such as "-250.00" or "250.00-". When an amount has been entered including two decimal places (e.g., 500.00), the cursor will automatically tab to the next field.
Note: If the configuration you are using is set up with the debit and credit accounts, you will only need to enter one amount, and the system will duplicate the amounts into the separate debit and credit accounts. See the Field list view description in the Customizing the Transactions Entry Screen section.
4.Click the Status field and correct any errors that are displayed for that line of information. Errors are displayed with a red icon ![]() , and must be corrected before posting. Transactions with a yellow warning indicator
, and must be corrected before posting. Transactions with a yellow warning indicator ![]() can still be posted.
can still be posted.
5.When all transactions have been entered correctly, you can post the transactions to the host computer.