CIM GOLDTeller Screen Details |
  

|
Navigation: CIM GOLDTeller Overview >
CIM GOLDTeller Screen Details |
|
At the top of the main CIM GOLDTeller screen are menus. See the following sections for more information concerning each of these menus:
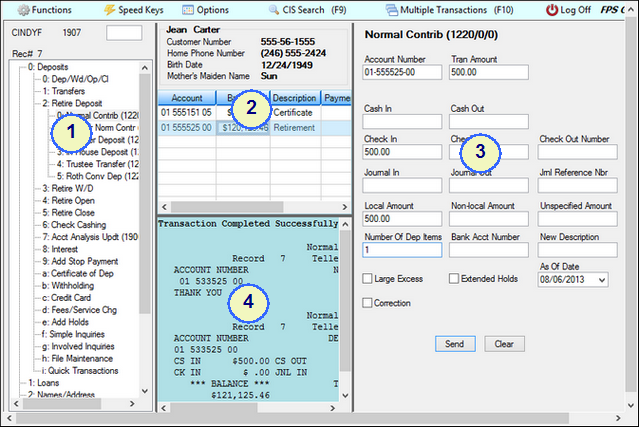
Below the menus is the main CIM GOLDTeller screen. This screen can be divided into four quadrants, as shown below:
| 1. | The first quadrant displays the teller name and number at the top, followed by a list of all the transactions available to the teller. To change which transactions are displayed here, use the Functions > Administrator Options > Menu Design screen. |
The transactions are divided into their categories, and then categories within categories, such as:
1. Deposits
2. Retirement Deposits
0. Normal Contribution (1220/0/0)
Transactions end with their respective transaction code on the end (such as 1220/0/0 in the example above). Click the transaction you want to run in this list, and the transaction will be displayed in the third quadrant.
| C TIP: | In the field to the right of the teller name, you can type the transaction you want to run by typing the number/letter in front of each category. For example, if you wanted to run the Loan Payment transaction, you would type "100" for 1: Loans, 0: Loan Payments, 0: Loan Pmt (600/0/0). |
NOTE
These numbers are based on each teller menu, so they may not be the same. |
| 2. | The second quadrant displays information concerning the customer that has been selected. To select a customer, use the CIS Search function (press <F9). To clear out any information in this field group and run a transaction for a different customer, press <Shift> + <F9> or select "Clear CIS Search Information" from the Functions menu. |
When you click an account listed below the name information, that account will be automatically filled in the third quadrant (Transaction Display) in the Account Number field of the transaction selected from the menu.
| 3. | This quadrant displays the transaction that was selected in quadrant 1. When all information is correctly entered on the transaction, click <Send> and the results of the transaction will be displayed in quadrant 4. Also see the Running Transactions topic. |
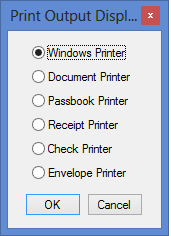
The paths for these printers are entered on the Printer Defaults tab on the System Configuration screen.
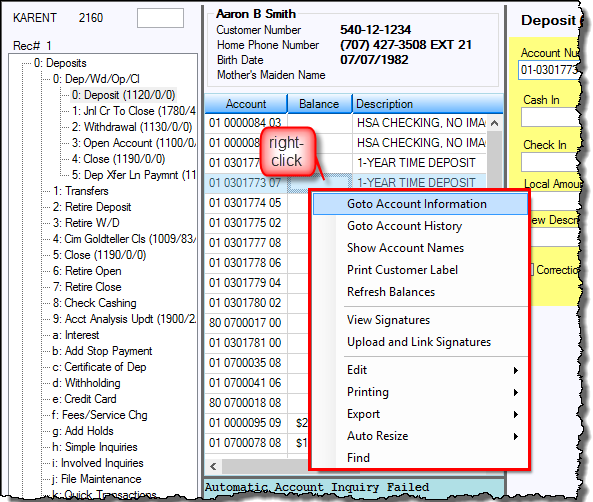
Right-click on an account in the list to open a menu that gives you quick access to account-related features. These features are explained below the following example.
Menu Item |
What It Does |
Goto Account Information |
Takes you to the Account Information screen for the selected account. |
Goto Account History |
Takes you to the History screen for the selected account. |
Show Account Names |
Opens a list of names linked to the selected account. |
Print Customer Label |
Displays the mailing address linked to the selected account in the Output Display below the account list. Click Ctrl+P to print the label. |
Refresh Balances |
If you have run transactions on any of the accounts in the list, click here to display the current balances on those accounts. |
View Signatures |
Opens File Services Plus so you can view signature captures. |
Upload and Link Signatures |
Opens File Services Plus so you can save and link signature captures. |
Edit |
Opens an editing menu so you can edit or copy information in the list. |
Printing |
Opens a printing menu, including printer settings, preview, and setup. |
Export |
Opens a menu so you can export information to Report Manager or to a text file. |
Auto Resize |
Opens a menu so you can resize the account list. |
Find |
Opens a dialog box box so you can search for information in the account list. |